Yet another little distraction from my big projects which never get done....
Having used a square-blade old wooden Rabbet Plane on a recent frame&panel job, I got the itch for a Skew-blade rabbeting plane. Ended up dumping some cash on a used Lie Nielsen No. 140 which is a gadget-lover's dream made of heavy bronze, and including a Fence. But it was in pretty rough shape. I spent 2 hours getting the blade reground and sharpened to my satisfaction. Next big problem was the front Knob being all beat-up and ugly.
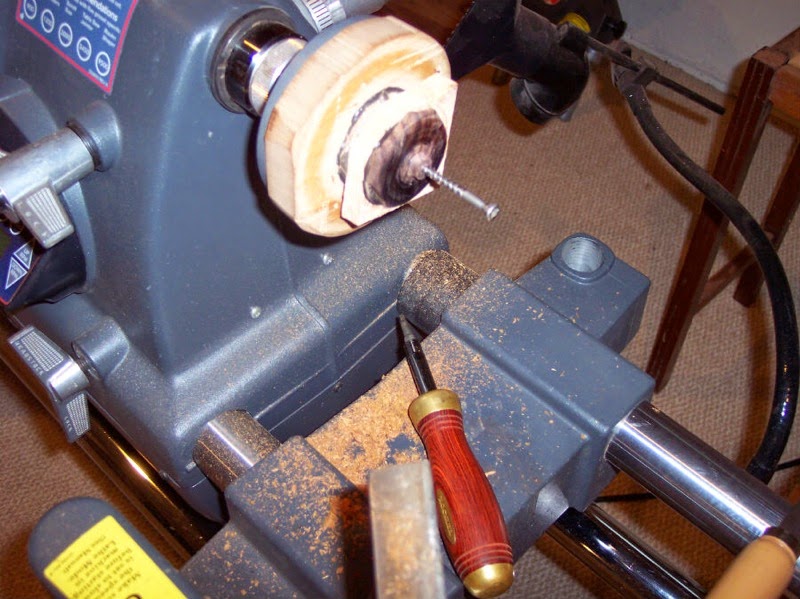
I used the following 'jig' in my repair. This lathe faceplate is used on 90% of my turning jobs; I love having a solid glue mount most of the time. But this time I put in a fairly sloppy center screw, with the intention of being able to turn a deliberate eccentric:
[ATTACH]25435[/ATTACH]
I reused the original Cherry knob from the plane. I glued on a new bottom to get a fresh edge there, and then I mounted the knob a little bit eccentric on my faceplate. After light turning and sanding, I had a lopsided knob just right for my challenge. Here, you can see the asymmetrical knob is situated to add more clearance to the 2 frequently-used screws that caused the dinging of the knob to begin with....
[ATTACH]25434[/ATTACH]
When one removes some of those screws and messes with the gadgetry, one can have a Rabbeting plane by virtue of the side of the plane being removed:
[ATTACH]25437[/ATTACH]
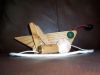
Finally, with a very sharp blade and almost everything done, a test cut is the neatest rabbet you ever saw!
[ATTACH]25436[/ATTACH]
Rehab Addict goes Eccentric!
Moderators: HopefulSSer, admin
Rehab Addict goes Eccentric!
- Attachments
-
- Eccentric Knob Mounted.jpg (122.49 KiB) Viewed 25528 times
-
- Eccentric Knob Jig.jpg (139 KiB) Viewed 25524 times
-
- LN140 Plane in Action.jpg (120.29 KiB) Viewed 25526 times
-
- LN140 Side Removed.jpg (131.73 KiB) Viewed 25526 times
Chris


Nice... I Love hand planes
Well it doesn't say Stanley buy the knob so I guess it's not a Stanley 140.
I have a Millers Falls 07 it doesn't quite look like that.
What plane is it?
EDIT DUHH I went back and read
now I like it even better
Well it doesn't say Stanley buy the knob so I guess it's not a Stanley 140.
I have a Millers Falls 07 it doesn't quite look like that.
What plane is it?
EDIT DUHH I went back and read
now I like it even better
Bruce
I didn't know what a Shopsmith was...
Three days later I owned one...
One week later I was rebuilding one...
Four months later I owned two....
Ok Ok, I'm up to four now...
I didn't know what a Shopsmith was...
Three days later I owned one...
One week later I was rebuilding one...
Four months later I owned two....
Ok Ok, I'm up to four now...
'Before' picture
Thanks for your good-humored support!
I had neglected to document my work before, but by searching a certain "flea-market bay" website, I found a picture....
[ATTACH]25452[/ATTACH]
The knob was nicked in several places, both top and bottom. I ended up shaving and replacing the bottom 1/8" of the knob with my overarm router. The upper part of the knob, I concentrated on (eccentric) wood removal and finishing.
All I have to do now is come up with a better-looking screw for the cap-holder (replacing that black-oxide one that a prior owner put in).
- Attachments
-
- LN140Before.jpg (145.12 KiB) Viewed 25404 times
Chris
-
rcplaneguy
- Platinum Member
- Posts: 549
- Joined: Mon Sep 23, 2013 6:33 pm
- Location: Chapel Hill, NC
As a ChromeDome, I had to do this
After a bit I located a nice oval-head screw for the lever-cap. I also contemplated the Bronze being not quite as shiny as I'd hoped. Plain old Brasso and elbow-grease only went so far.
Using my Dremel buffer-tip and compound showed a lot of promise for shine-level, but it was leaving small vibration marks, like a bad router cut in wood. So, not ready to spring for a $70-plus BEALL system, I just picked up one buffer wheel and re-used my Dremel polishing compound:
[ATTACH]25522[/ATTACH]
The bigger wheel-radius did make a more uniform shine; I like it! I'll have to see about putting more buffing into my methods of work from now on:
[ATTACH]25521[/ATTACH]
- Attachments
-
- LN140withBling.jpg (128.44 KiB) Viewed 25268 times
-
- TryingBufferWheel.jpg (70.07 KiB) Viewed 25270 times
Chris
How I salvage some wood knobs
As an aside, I have several times replaced cracked/missing portions of wood knobs and re-turned them. Here is shown a crude "sled" which lets me mount knobs upside-down. Then I run them under the Overarm Router, milling off the cracked parts of their bases.
This kind of milling operation lets me glue in some replacement wood that glues to 2 different faces (vertical and horizontal) for strength. Then I can later remove excess wood and re-turn the parts for a "save."
[ATTACH]25594[/ATTACH]
This kind of milling operation lets me glue in some replacement wood that glues to 2 different faces (vertical and horizontal) for strength. Then I can later remove excess wood and re-turn the parts for a "save."
[ATTACH]25594[/ATTACH]
- Attachments
-
- Rosewood knob milling.jpg (104.5 KiB) Viewed 25162 times
Chris
Knob Salvaging Sequence
Continuing on....
It may seem like a lot of trouble, but on jobs like this, a concentric center-hole and counterbored holes for nuts are hard to pull off. So salvaging a knob is a little bit easier than making a new one.
After some hand-sawing, the strip sander takes off most of the excess "patch" wood:
[ATTACH]25649[/ATTACH]
Then it's round enough to work on the lathe; here I've added a brass tube inside this knob so I can treat it like a Pen blank on my pen-turning mandrel:
[ATTACH]25648[/ATTACH]
Finally, I get a repair-job done. This is a Stanley No. 98 side rabbet plane. It's the Roy-Underhill tool for the "Dusty"-type of job of increasing a dado-width by thousandths of inches at a time (anal work):
[ATTACH]25647[/ATTACH]
- Attachments
-
- 98PlaneFixed.jpg (128.89 KiB) Viewed 25090 times
-
- ReTurningKnob.jpg (111.37 KiB) Viewed 25089 times
-
- StripSandExcess.jpg (86.43 KiB) Viewed 25094 times
Chris