A few more minutes of details after some glues had dried....
Here are a couple of fitting items going on. The topmost of the long drawers had prior-owner repairs, plus a slight interference with the cross-beam. I just decided to plane it to fit better.
Also, the bottom of the case originally had stacked felt-pads to support the front-panel when stowed. I replaced those with 2 dowels that I trimmed for desired heights, then topped with felt-pads:
[ATTACH]22089[/ATTACH]
The drawer with all the new work put into it, is now shaping up. I'm cleaning the sides at the same time I'm flushing-down the hardwood reinforcements I added to the dados:
[ATTACH]22090[/ATTACH]
Back in the Machine(ist Chest) Shop
Moderators: HopefulSSer, admin
Making One's Drawers Fit
- Attachments
-
- Fitting Things.jpg (109.72 KiB) Viewed 17415 times
-
- Drawer Trimming.jpg (102.05 KiB) Viewed 17413 times
Chris
Home Stretch, Jul 14 Target
I'll be seeing the 'target' nephew for this chest on July 14. I think I'll make it!
One thing I'm not sure about is that front bookmatched panel I messed up. I've started to think about a small brass nameplate over the "blotch". Hmmm..... opinions welcome.
[ATTACH]22104[/ATTACH]
Work on the (11) drawers is now done! The new bottom drawer repair is very sturdy, matches decently:
[ATTACH]22105[/ATTACH]
There's some more felt-work to finalize, but 99% of the nervous work is now done.
- Attachments
-
- Thinking About the Front.jpg (118.44 KiB) Viewed 17387 times
-
- All Drawers Fitted.jpg (114.96 KiB) Viewed 17388 times
Chris
-
terrydowning
- Platinum Member
- Posts: 1678
- Joined: Mon Jul 19, 2010 3:26 pm
- Location: Windsor, CO
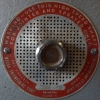
Well, I went ahead and got a small brass nameplate with the nephew's name:
[ATTACH]22120[/ATTACH]
Last step was to use the DC3300 to suck all the chips and dust out!
[ATTACH]22121[/ATTACH]
All should be well for delivery this weekend. Thanks for your encouragements!
[ATTACH]22120[/ATTACH]
Last step was to use the DC3300 to suck all the chips and dust out!
[ATTACH]22121[/ATTACH]
All should be well for delivery this weekend. Thanks for your encouragements!
- Attachments
-
- Aarons Badge Added.jpg (103.83 KiB) Viewed 17327 times
-
- Vacuumed Out.jpg (106.09 KiB) Viewed 17322 times
Chris
-
Ed in Tampa

- Platinum Member
- Posts: 5830
- Joined: Fri Jul 21, 2006 12:45 am
- Location: North Tampa Bay area Florida
Really nice work!
If I may make a suggestion? Try a sanding sealer (diluted shellac) before you stain and finish. It will help keep the wood from grabbing the stain.
If you weren't looking for advice then forget I said anything and only read what I said first
Nice Work!
If I may make a suggestion? Try a sanding sealer (diluted shellac) before you stain and finish. It will help keep the wood from grabbing the stain.
If you weren't looking for advice then forget I said anything and only read what I said first
Nice Work!
Ed in Tampa
Stay out of trouble!
Stay out of trouble!
Hi Ed,
Your suggestion is indeed a good one. What I had fouled-up was severe enough in terms of texture (really my planing oversight) that it was going to show up no matter what. In effect I did have a sealer (wiping varnish) before my stain (dark brown Briwax), similar to the "dirty mahogany" finish in the Christopher Schwarz blogs:
http://www.popularwoodworking.com/techn ... any-finish
Live and learn! Anyway, I think that chest is past 50 years old, so "old enough for a dirty joke" .
.
Your suggestion is indeed a good one. What I had fouled-up was severe enough in terms of texture (really my planing oversight) that it was going to show up no matter what. In effect I did have a sealer (wiping varnish) before my stain (dark brown Briwax), similar to the "dirty mahogany" finish in the Christopher Schwarz blogs:
http://www.popularwoodworking.com/techn ... any-finish
Live and learn! Anyway, I think that chest is past 50 years old, so "old enough for a dirty joke"
Chris
-
alisfair
- Gold Member
- Posts: 89
- Joined: Sun Jul 07, 2013 10:31 pm
- Location: Grand Rapids, Michigan
- Contact:
tool chests
WOW nice work. I have two that need work done on them. Just don't know where to start, then there are finger joints to do properly.
Starting a 5th Refurb
Well, here goes again!
By the way, since working with these chests, I've come to really like Oak wood more than I used to. It's a really strong wood, doesn't give me allergies, can adapt to a lot of finishes.... also I read a few months ago there is a surplus of oak these days. It's affordable and easy to find.
This old chest is one of the smaller ones I've come across. A few members were really shot so I've been replacing them gradually. I often make slightly oversize parts and trim them down after installation. Some of the major panels just needed to be planed down. However due to the bookmatched big panels, grain direction swaps right across the joint-line, so care is required on the direction of the handplane strokes. One matched-panel didn't want to stay glued together, so I added a little butterfly for holding strength.
[ATTACH]23284[/ATTACH]
- Attachments
-
- Kyles Chest Started.jpg (109.5 KiB) Viewed 17205 times
Chris
Pausing to watch Roy Underhill in a few minutes
A little more work is done; these jobs stretch on for weeks. I stopped for some checks and clean-up, then I'll watch Mr. Underhill here in a little while on TV.
I used the handsaw, chisels, and finally the Overarm Router to remove the cruddy front lip of the top lid. A new piece is now glued in and flushed. Note the contrast of fresh / planed wood compared to the old front-piece:
[ATTACH]23311[/ATTACH]
Some of the carefully aligned bits are now re-fitted, like the drawer dividers. The upper back and lid-back still need to be cut down to size. I also had the left wall start to separate along its old glue-line, so I epoxied in a rough "dutchman" inside, which will later be cut flat and then covered with felt:
[ATTACH]23312[/ATTACH]
- Attachments
-
- Lid Lip Replaced.jpg (93.54 KiB) Viewed 17172 times
-
- Test Assembly.jpg (105.33 KiB) Viewed 17168 times
Chris