
OK, since you went there!
Back in the early '80s, I was in the Army Reserves.
Yes, that unit had a few women, and a couple of
them rather attractive.
Cut to the chase. Wendy, a REAL attractive E5,
was walking around, looking for the filler tube,
for the old-style 5 gallon fuel cans that we used.
She was using the same name the rest of us
used. (Had something to do with a donkey,
if you catch my drift.)
"Wendy, I've got one, but you're NOT putting
Mogas through it!"
steve
Using a Shop Smith Mark V on a Chris Craft Roamer refit
Moderators: HopefulSSer, admin
Re: Using a Shop Smith Mark V on a Chris Craft Roamer refit
10 ER, stripped down.
Basic 10ER, Parts machine. Will be a semi-dedicated drill-press machine.
10 ER, a "survivor" of the trailer fire, in the back yard, needing restoration. Has a Mk5 headrest. Finally, stripped down.
Numerous parts, for Model 10 stuff. Except for lower saw guard, A and B adapters, I've got it.
Looking for one more, or some 9 inch extension table raisers.
Re: Using a Shop Smith Mark V on a Chris Craft Roamer refit
HA! Steve, that'd get you a sexual harassment charge these days...the olden days were so much better.
Dennis, thank you so much for the compliments! What kind of welder did you get? And on that gas can you recommended, that's the best EPA-compliant nozzle I've seen. I could see how it's an improvement over the giant funnel I've been using to direct pour, since it would help avoid the occasional overpour. I may pick one up.
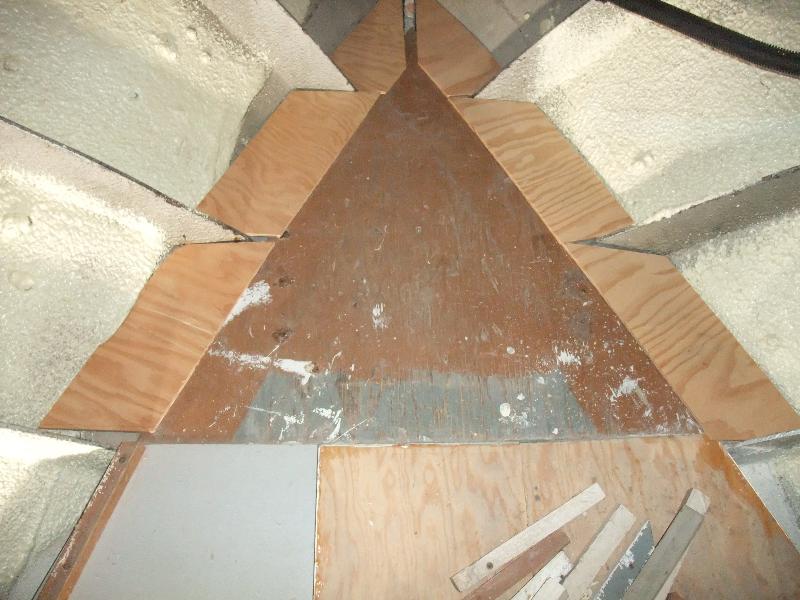
That said, my article for today isn't especially exciting but it really did a good job keeping dust out of the bilge when we were prepping and painting the Throne Room. I put little filler panels between the plywood floor panels and the hull to fill the gaps. Chris Craft only did that in the salon, to keep engine room smells and sounds out of the living spaces. But I hate cleaning the bilge, so the more dust and other stuff that I can keep out of the bilge, the better.
1969 Chris Craft Roamer Refit: Sealing Up the V-berth Floor
Cheers,
Q
Dennis, thank you so much for the compliments! What kind of welder did you get? And on that gas can you recommended, that's the best EPA-compliant nozzle I've seen. I could see how it's an improvement over the giant funnel I've been using to direct pour, since it would help avoid the occasional overpour. I may pick one up.
That said, my article for today isn't especially exciting but it really did a good job keeping dust out of the bilge when we were prepping and painting the Throne Room. I put little filler panels between the plywood floor panels and the hull to fill the gaps. Chris Craft only did that in the salon, to keep engine room smells and sounds out of the living spaces. But I hate cleaning the bilge, so the more dust and other stuff that I can keep out of the bilge, the better.
1969 Chris Craft Roamer Refit: Sealing Up the V-berth Floor
Cheers,
Q
Re: Using a Shop Smith Mark V on a Chris Craft Roamer refit
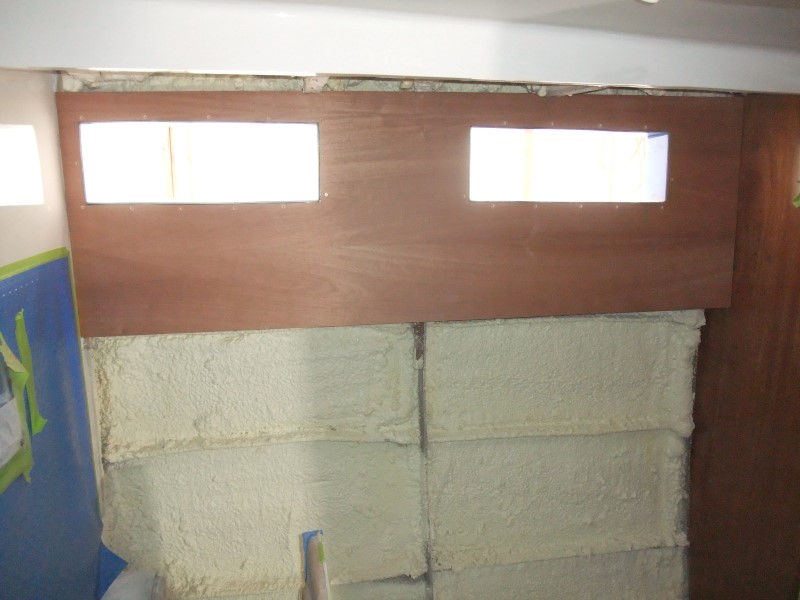
My painter has been too busy to spray the mahogany v-berth bulkhead panel, so I rearranged the aft stateroom and its en suite head and started cutting the mahogany panels that surround all of the portholes back there. It's looking pretty good!
1969 Chris Craft Roamer Refit: Aft Head Mahogany Wall Panels
Cheers,
Q
1969 Chris Craft Roamer Refit: Aft Head Mahogany Wall Panels
Cheers,
Q
Re: Using a Shop Smith Mark V on a Chris Craft Roamer refit
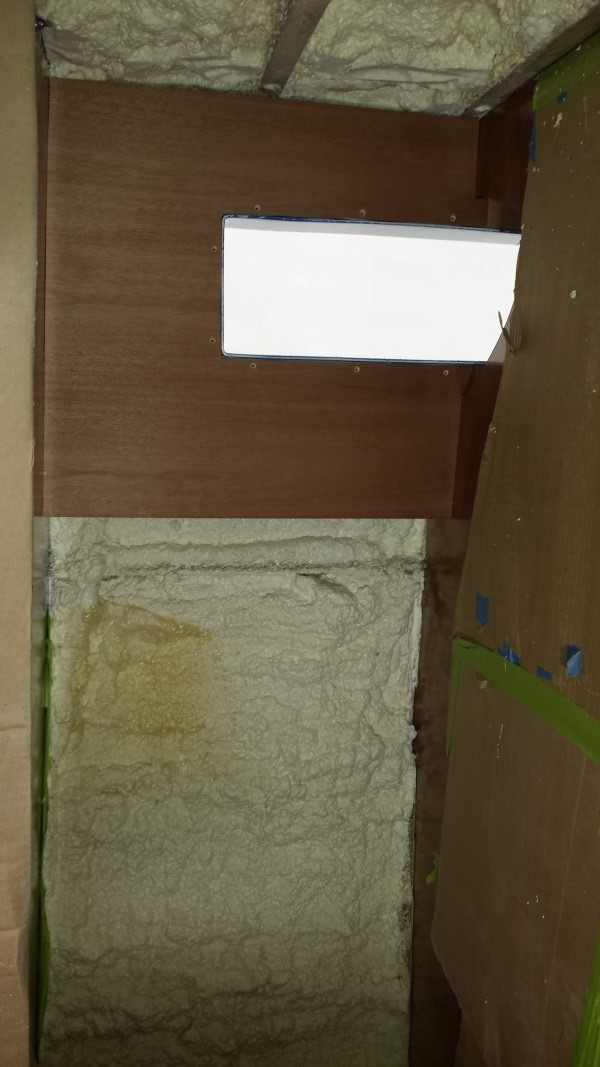
I got busy cutting more porthole surround panels over the weekend. This is a crucial step, since I can't install the portholes until these panels are cut, clear coated, insulated and sealed on the backside, then finally installed. One great thing about getting back into the woodworking side of things is that the stack of plywood in the salon is shrinking, which kind of works like a progress-o-meter. When the stack's gone, the job should almost be done.
1969 Chris Craft Roamer 46 Refit: Aft Stateroom Porthole Surround Panels II
Cheers
Q
Don't forget what's hiding under the ugly, dust-covered cardboard:

1969 Chris Craft Roamer 46 Refit: Aft Stateroom Porthole Surround Panels II
Cheers
Q
Don't forget what's hiding under the ugly, dust-covered cardboard:
Re: Using a Shop Smith Mark V on a Chris Craft Roamer refit
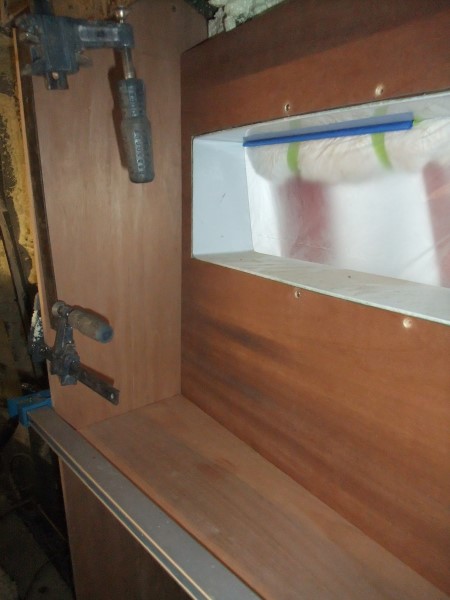
The transom porthole surround panels have been on my mind for a while, since they're the foundation for all of the cabinetry in the aft stateroom. My concept drawings didn't go into detail on the transom because at the time I didn't know where the fuel fills would be. Chris Craft left the fuel fill pipes exposed, but I want to box mine in. So I just kinda worked with the plan in my head and started cutting panels. I have to say, it didn't turn out too bad.
1969 Chris Craft Roamer 46 Refit: Aft Stateroom Porthole Surround Panels III
Cheers,
Q
1969 Chris Craft Roamer 46 Refit: Aft Stateroom Porthole Surround Panels III
Cheers,
Q
-
BuckeyeDennis

- Platinum Member
- Posts: 3697
- Joined: Tue Jul 24, 2012 10:03 pm
- Location: Central Ohio
Re: Using a Shop Smith Mark V on a Chris Craft Roamer refit
Ya know Q, I'm starting to believe that you might actually splash this year. 
Re: Using a Shop Smith Mark V on a Chris Craft Roamer refit
Thanks, BuckeyeDennis! Truth told though, I'm getting less and less optimistic as time goes on, but I haven't given up yet.
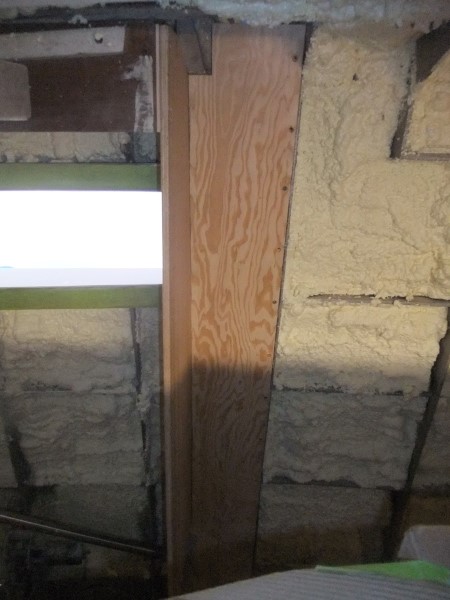
I did more woodwork on the transom and made panels that connect the bilge to the vent openings on the outside of the boat. Both of the main vertical panels are done and ready for clear coating with ICA. I'll leave them installed until I have all of the African mahogany plywood panels that connect to them are cut and dry-fitted.
Progress...
1969 Chris Craft Roamer 46 Refit: Aft Stateroom Porthole Surround Panels IV
Cheers,
Q
Re: Using a Shop Smith Mark V on a Chris Craft Roamer refit
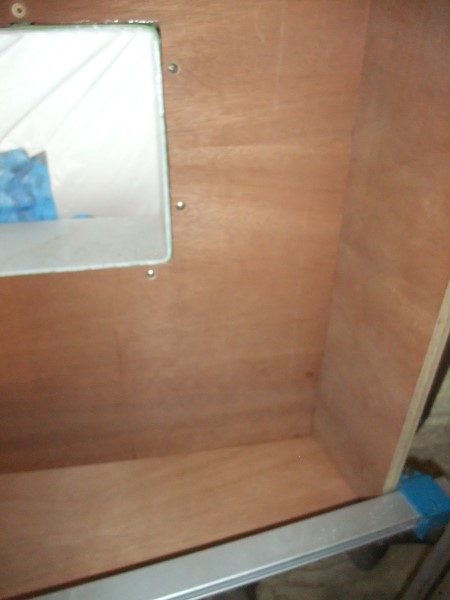
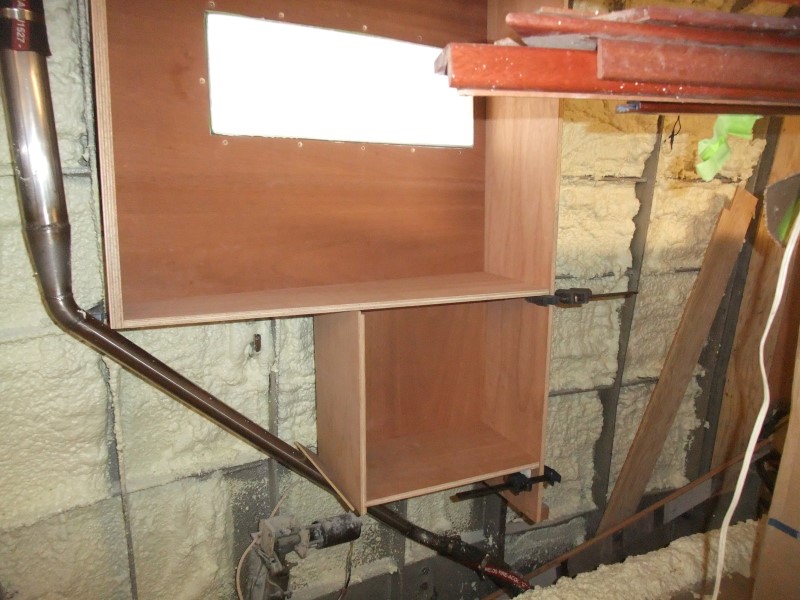
I got the starboard side transom porthole surround panels cut and dry-fitted. I also made a cool little cabinet box that goes under those panels and takes advantage of an otherwise not very usable space.
1969 Chris Craft Roamer 46 Refit: Aft Stateroom Porthole Surround Panels V
Cheers,
Q
1969 Chris Craft Roamer 46 Refit: Aft Stateroom Porthole Surround Panels V
Cheers,
Q
Re: Using a Shop Smith Mark V on a Chris Craft Roamer refit
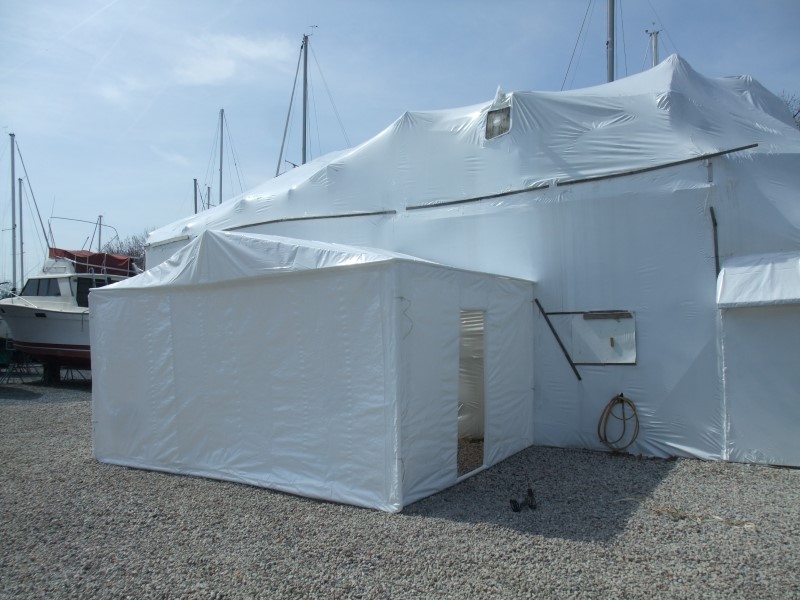
I haven't posted for a while because I got knocked down by the nastiest cold I've ever had. Start to finish it took more than two weeks to get over. I'm back at it now, and spent a long weekend making a portable/folding spray booth. The booth my painter has been using at work is backed up with jobs, and there isn't any sign of that changing in the near future. So making a booth on-site was the only practical solution. Since the boat is in Maryland, which has a "rain tax" that gets applied to structures, pavement, concrete pads, etc...basically, anything that interferes with the flow of rain into the ground. So the booth can't be a permanent or semi-permanent installation. It's essential to be able to set it up quickly on a Saturday morning and take it down by Sunday evening. It looks like it'll work well.
1969 Chris Craft Roamer 46 Refit: Making an Origami Spray Booth
Cheers,
Q
1969 Chris Craft Roamer 46 Refit: Making an Origami Spray Booth
Cheers,
Q
Re: Using a Shop Smith Mark V on a Chris Craft Roamer refit
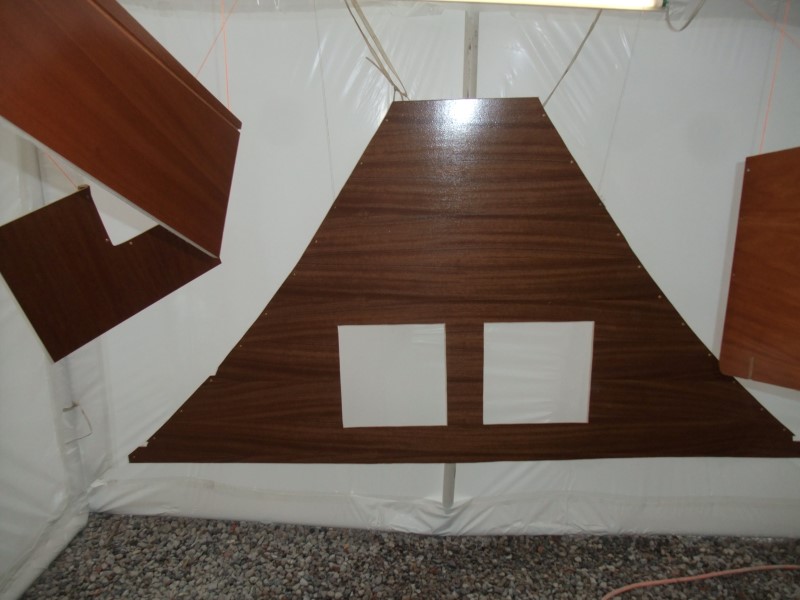
We finally gave the spray booth a test drive. It worked great! And it folds up and out of the way in ~25 minutes. Now I've got a bunch of mahogany panels base coated and ready for installation. This should be fun.
1969 Chris Craft Roamer 46 Refit: Spraying Mahogany Panels in the Origami Spray Booth
Cheers,
Q
1969 Chris Craft Roamer 46 Refit: Spraying Mahogany Panels in the Origami Spray Booth
Cheers,
Q