Page 39 of 88
Re: Using a Shop Smith Mark V on a Chris Craft Roamer refit
Posted: Tue Apr 04, 2017 8:06 am
by roamer46
It was one helluva sticky epoxy weekend, but I did get the big mahogany panel installed. Turned out pretty nice, too.
1969 Chris Craft Roamer 46 Refit: Installing the New Mahogany V-berth Bulkhead Panel
Cheers,
Q
Before
After
Re: Using a Shop Smith Mark V on a Chris Craft Roamer refit
Posted: Tue Apr 04, 2017 3:07 pm
by swampgator
I am really enjoying this thread and all the pictures. Looking forward to the final tour to see all your work and success. Good luck.
Steve, the old Florida gator
Re: Using a Shop Smith Mark V on a Chris Craft Roamer refit
Posted: Fri Apr 07, 2017 8:31 am
by roamer46
Thanks, Steve!
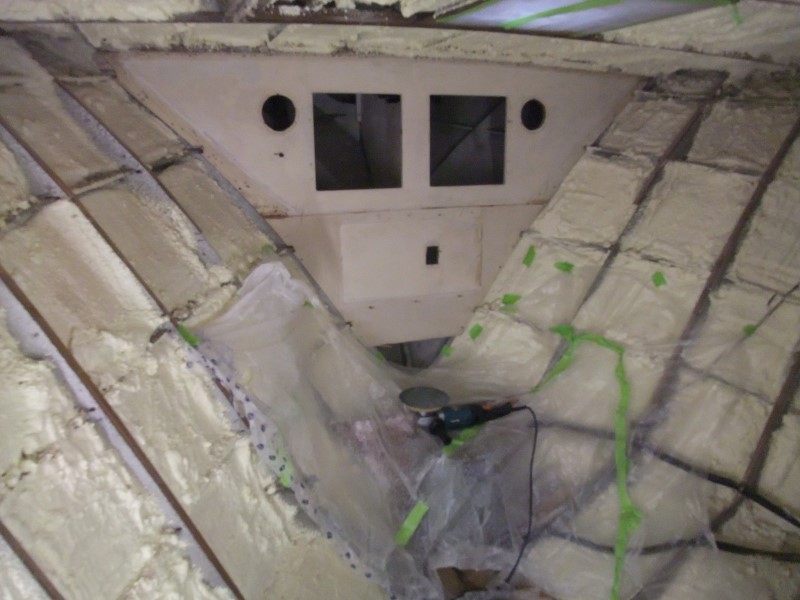
To put the portholes in as part of the waterproofing effort, I need to get all of the mahogany panels surrounding the portholes installed. The ones in the V-berth will be the most challenging, since the hull and frames there are curved and I'd like the plywood to more or less follow those curves. I thought I'd be able to just transfer the shape of the original wall panels, which were made of medium density fiberboard, to plywood, but the properties of those two materials are different enough that it's just not working well at all. I've got some ideas for how to make it work, but I wanted to ponder on it for a bit before cutting into the mahogany panels. That stuff is expensive, and I don't want to end up with a big pile of scrap.
1969 Chris Craft Roamer 46 Refit: Preparing to fit the V-berth Mahogany Panels
Cheers,
Q
Good fit with the fiberboard
Not so good fit with luan plywood practice panel
Re: Using a Shop Smith Mark V on a Chris Craft Roamer refit
Posted: Fri Apr 07, 2017 6:34 pm
by beeg
Might try cutting shallow dados that wood allow the sheet to bend a little better.
Re: Using a Shop Smith Mark V on a Chris Craft Roamer refit
Posted: Sat Apr 08, 2017 9:35 am
by BuckeyeDennis
With a track saw, you could easily kerf the backside of the plywood in any direction, for easier bending along any particular axis. But I think that it still isn't going to want to form a compound curve.
If it were solid wood, you could (theoretically) steam it and install while "stretchy". But I don't think that would work out real well with pre-finished plywood!
Which brings us to "planking" it. Cut into sufficiently narrow "boards", the plywood would conform to the compound curves. Which could look good/appropriate, but you would have a whole lot of edge seams to deal with. What kind of seam treatment were you contemplating for the full-sized sheets?
Re: Using a Shop Smith Mark V on a Chris Craft Roamer refit
Posted: Tue Apr 11, 2017 10:24 am
by roamer46
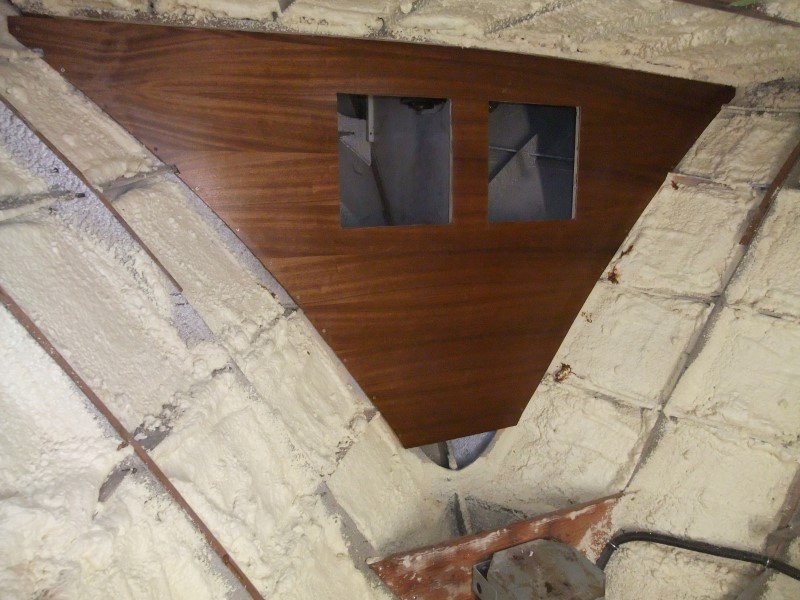
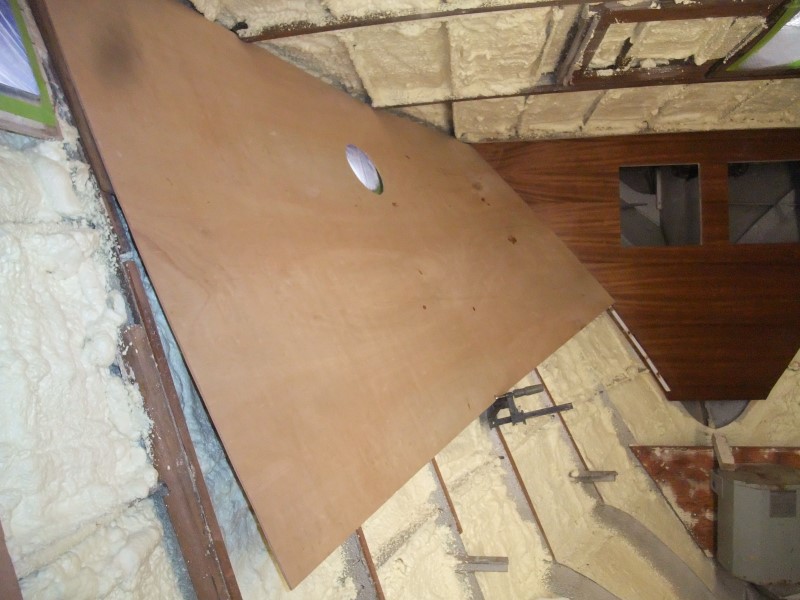
All valid suggestions...and I considered every one of them, but ultimately I went another way. Kerfing the backside is an approach I've used before, but this is 3-ply plywood. My concern was that I'd end up with hard lines at the kerfs instead of a smooth arc. Planking would look planky...I wanted to avoid that. 'Light dawned on rocky dome' when I realized that if I changed the orientation of the pattern on the plywood, I'd end up with a longer leading edge and shorter trailing edge, and that would give better results when I warped the panel into position. It also helped to appreciate that since this isn't a structural piece, the cleats don't need full contact with the back of the panel from top to bottom. I also decided a full-length shelf at the bottom edge of the panel (similar to what Chris Craft did) would be a good thing. That shelf will tie the panel into the rest of the cabinetry around the bunk and stabilize the bottom edge of this panel even where it doesn't contact the cleat. I think it turned out pretty good.
1969 Chris Craft Roamer 46 Refit: Cutting and Fitting the V-berth Port Side Mahogany Panel
Cheers,
Q

Re: Using a Shop Smith Mark V on a Chris Craft Roamer refit
Posted: Thu Apr 13, 2017 9:10 am
by roamer46
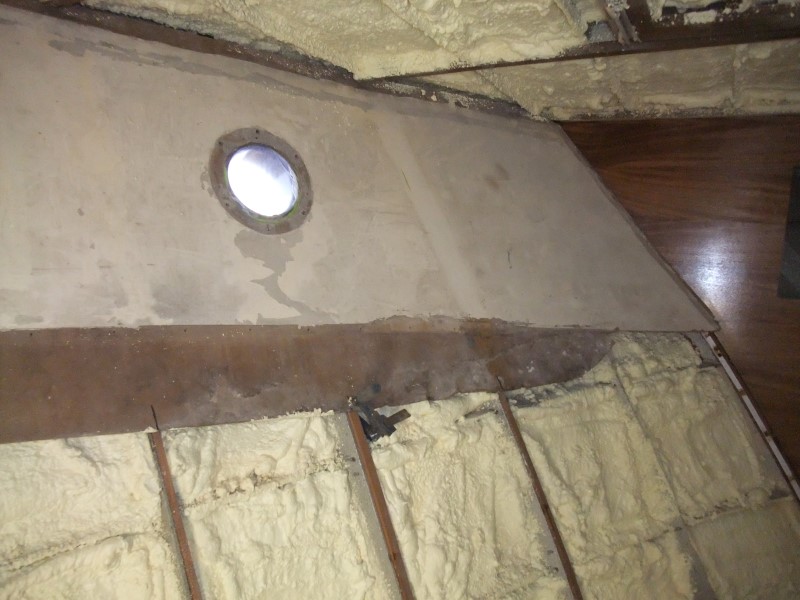
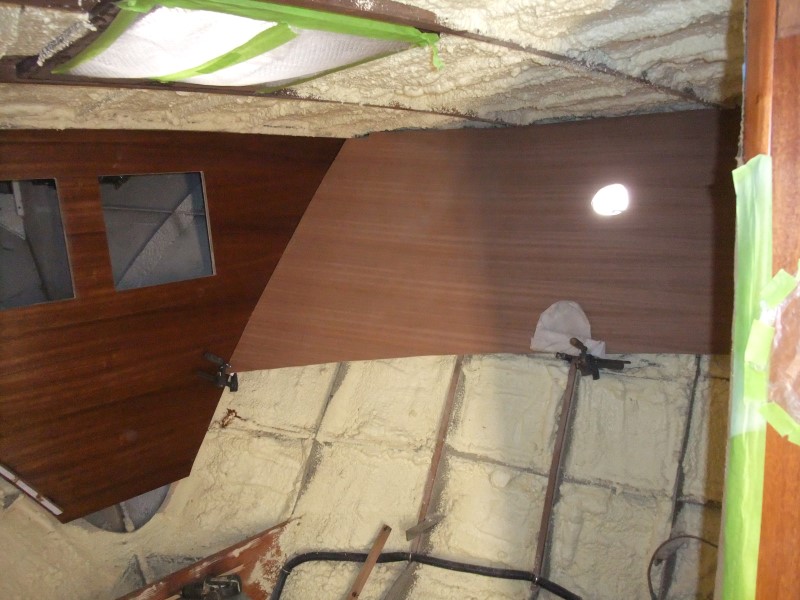
I got the starboard side done next. There sure is less drama once you work out how to do stuff. lol
1969 Chris Craft Roamer 46 Refit: Cutting and Fitting the V-berth Starboard Side Mahogany Panel
Cheers,
Q
Re: Using a Shop Smith Mark V on a Chris Craft Roamer refit
Posted: Fri Apr 21, 2017 9:26 am
by roamer46
Well, my painter's schedule and mine still aren't matching up. That's really putting the hurt into my plan to splash this year. But something else came up (or down) that required my attention: cutting up some big old, dying maples that were endangering my house. I spent two weekends cutting them up, but that's pretty much done now. I'll be back in the boatyard this weekend, and hopefully the painter will show up.
1969 Chris Craft Roamer 46 Refit: Taking A Break...sort of
Cheers,
Q

Re: Using a Shop Smith Mark V on a Chris Craft Roamer refit
Posted: Sun Apr 23, 2017 10:57 pm
by swampgator
Wow, Chris. What a large maple. If I had a couple of slices of that, I could saw them into blocks and let them dry. That is almost perfect size wood for making mallets. You could turn them on the Shopsmith and give them to all your helpers after the boat is finished. Looking forward to the completed interior.
Steve, the old Florida gator
I just love it when she says I can go make sawdust.


Re: Using a Shop Smith Mark V on a Chris Craft Roamer refit
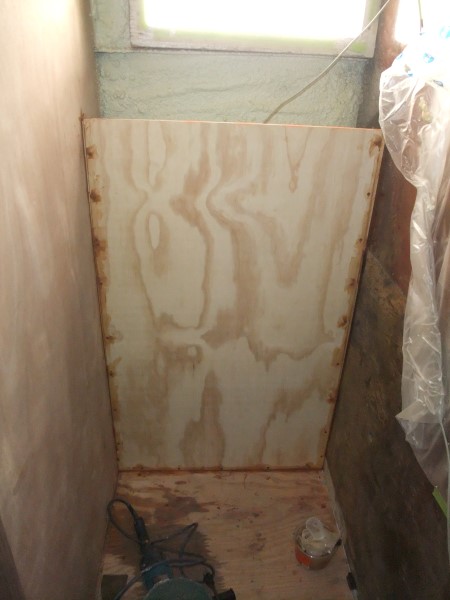
Posted: Fri Apr 28, 2017 8:42 am
by roamer46
Steve, I could make a lot of very big mallets with the pile of maple I've got. lol
My painter's schedule still isn't matching mine, so I cut, insulated, and installed the back wall in the laundry closet. Getting the washer and dryer into their final resting places will be a HUGE improvement in the aft stateroom. I'm getting sick of climbing around them.
1969 Chris Craft Roamer 46 Refit: The Laundry Closet Back Wall
Cheers,
Q