Rehab Addict goes Eccentric!
Posted: Thu Jun 19, 2014 7:46 pm
Yet another little distraction from my big projects which never get done....
Having used a square-blade old wooden Rabbet Plane on a recent frame&panel job, I got the itch for a Skew-blade rabbeting plane. Ended up dumping some cash on a used Lie Nielsen No. 140 which is a gadget-lover's dream made of heavy bronze, and including a Fence. But it was in pretty rough shape. I spent 2 hours getting the blade reground and sharpened to my satisfaction. Next big problem was the front Knob being all beat-up and ugly.
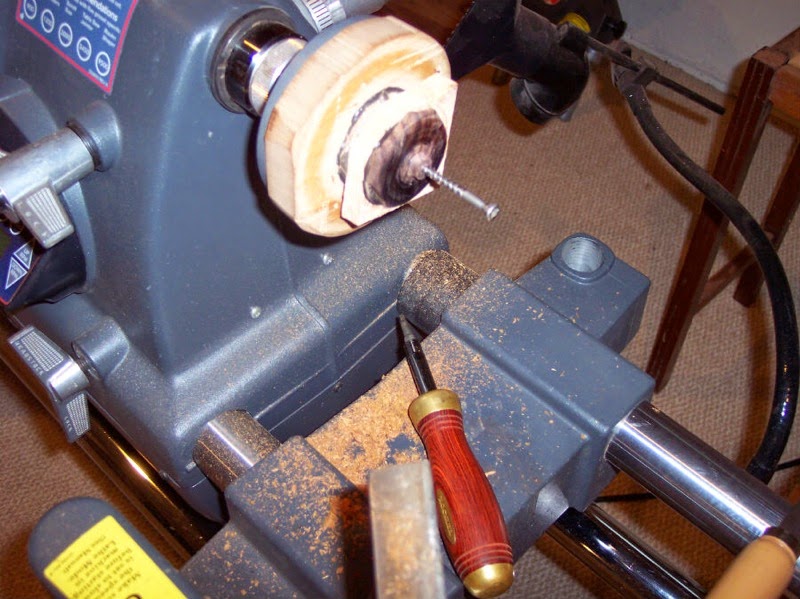
I used the following 'jig' in my repair. This lathe faceplate is used on 90% of my turning jobs; I love having a solid glue mount most of the time. But this time I put in a fairly sloppy center screw, with the intention of being able to turn a deliberate eccentric:
[ATTACH]25435[/ATTACH]
I reused the original Cherry knob from the plane. I glued on a new bottom to get a fresh edge there, and then I mounted the knob a little bit eccentric on my faceplate. After light turning and sanding, I had a lopsided knob just right for my challenge. Here, you can see the asymmetrical knob is situated to add more clearance to the 2 frequently-used screws that caused the dinging of the knob to begin with....
[ATTACH]25434[/ATTACH]
When one removes some of those screws and messes with the gadgetry, one can have a Rabbeting plane by virtue of the side of the plane being removed:
[ATTACH]25437[/ATTACH]
Finally, with a very sharp blade and almost everything done, a test cut is the neatest rabbet you ever saw!
[ATTACH]25436[/ATTACH]
Having used a square-blade old wooden Rabbet Plane on a recent frame&panel job, I got the itch for a Skew-blade rabbeting plane. Ended up dumping some cash on a used Lie Nielsen No. 140 which is a gadget-lover's dream made of heavy bronze, and including a Fence. But it was in pretty rough shape. I spent 2 hours getting the blade reground and sharpened to my satisfaction. Next big problem was the front Knob being all beat-up and ugly.
I used the following 'jig' in my repair. This lathe faceplate is used on 90% of my turning jobs; I love having a solid glue mount most of the time. But this time I put in a fairly sloppy center screw, with the intention of being able to turn a deliberate eccentric:
[ATTACH]25435[/ATTACH]
I reused the original Cherry knob from the plane. I glued on a new bottom to get a fresh edge there, and then I mounted the knob a little bit eccentric on my faceplate. After light turning and sanding, I had a lopsided knob just right for my challenge. Here, you can see the asymmetrical knob is situated to add more clearance to the 2 frequently-used screws that caused the dinging of the knob to begin with....
[ATTACH]25434[/ATTACH]
When one removes some of those screws and messes with the gadgetry, one can have a Rabbeting plane by virtue of the side of the plane being removed:
[ATTACH]25437[/ATTACH]
Finally, with a very sharp blade and almost everything done, a test cut is the neatest rabbet you ever saw!
[ATTACH]25436[/ATTACH]