This will be a rather short edition. Other than a little sanding, I got absolutely no work done in the shop.
A combination of spring yard work, several hockey games on tv, and a bug that finally laid me low took up all the time. And then of course it is tax time.
A fellow forum member sent me a couple of pictures and measurements of a vertical wine rack he made so I could consider it. It looks like a good project for later when I will be producing for the fall craft shows.
The forum was interesting again, especially the revival of the debate over the Shopsmith vs stand alones by a new member. I think anyone looking at some of the work done by forum members, should be convincing enough that we can do any thing on a SS that can be done on stand alones. Another reason for posting our projects!
Have a Fun and Safe week!
John
Chuck is a good example, besides the great projects, he even manages to "carve" wild animals on the SS.
I think anyone looking at some of the work done by forum members, should be convincing enough that we can do any thing on a SS that can be done on stand alones.
...
Except for taking up space that is better used for wood storage!:D
I just finished getting the new router table top ready for formica. So hopefully, it will be router ready by this next weekend so I can start building cabinets again.
Hawk
Dayton OH and loving it! (Except they closed the store. )
Everything seems to take longer than expected. This week had to attach the tops and shelves to the tables. The small 3/4"x3/4"x4" support blocks had been sawn and were waiting patiently for me to affix them. Drill screw holes, both horizontal and vertical and glue & screw them to the sides. Wish I had taken the time to put them on before the tables were assembled, because precise location was a problem.
Now the full length blocks used to attach the tops. Didn't put these on before assembly either. This worked out in the long run to be a good thing. These pieces have a screw hole in the center and screw slots toward the ends. (Slots allow for wood movement) There is a pretty full assortment and inventory of screws in my shop. I had no anticipation of a need to go screw shopping. Needing pan head screws for the slots, the best fit I could find were 8 X 1/4". With a washer beneath the screw head this wouldn't bite into the top deep enough to please me. (had to go through a 3/4" support before reaching the 3/4" top) However using the 8 X 1/1/2" screws would be pretty hairy to keep the screws from peeking out of the top, let alone the pilot hole.
After a bit of fitting and clamping, I found any screw head protruding out of the bottom of the shelf support would severely hinder drawer movement. So finding that I should still machine the supports, - got out the the OPR and routed recesses 3/16" deep X 1/2" wide over the slots. With a wood screw in the hole and 1 1/4" pan heads with washers in the recessed slots - this became perfect!
After drilling necessary pilot holes in the shelves and tops, (marked locations using a bare pencil lead) was finally ready for finishing. But wait a minute!!
The plans had called for breadboard ends, and I chose not to do that trying to keep more with the Mission style. But the tops were sawn square with sharp edges - this just wouldn't do. Should I rout the edges? Maybe a thumbnail on the bottom? An internet search showed most of similar tables had rounded edges. I was about to use the tapering floor molding bit but then worried about tear out - so decided to sand the curves.
Setting up the conical disk with the table tilted 8 degrees to the right, gave me a 12 degree face. After sanding, just needed a bit of hand block sanding to make the edges rounded.
Now time for finishing!! Not so fast! The support blocks for the shelves had to be taped to prevent staining. These (the 4" in the middle) were to be both glued and screwed. Also had to tape the center edge of the shelf bottom. There's no worry about the top - no glue here!
Octogenarian's have an earned right to be a curmudgeon.
Chuck in Lancaster, CA
Everything seems to take longer than expected. This week had to attach the tops and shelves to the tables. The small 3/4"x 3/4"x 4" shelf support blocks had been sawn and were waiting patiently for me to affix them. Drill screw holes, both horizontal and vertical and glue & screw them to the sides. Wish I had taken the time to put them on before the tables were assembled, because precise location was a problem.
Now the full length blocks used to attach the tops. Didn't put these on before assembly either. They even had a dado to fit around the rear leg. This worked out in the long run to be a good thing. These pieces have a screw hole in the center and screw slots toward the ends. (Slots allow for wood movement) There is a pretty full assortment and inventory of screws in my shop. I had no anticipation of a need to go screw shopping. Needing pan head screws for the slots, the best fit I could find were 8 X 1/4". With a washer beneath the screw head this wouldn't bite into the top deep enough to please me. (had to go through a 3/4" support before reaching the 3/4" top) However using the 8 X 1/1/2" screws would be pretty hairy to keep the screws from peeking out of the top, let alone the pilot hole.
After a bit of fitting and clamping, I found any screw head protruding out of the bottom of the shelf support would severely hinder (block) drawer movement. So finding that I should still machine the supports, - got out the the OPR and routed recesses 3/16" deep X 1/2" wide over the slots. With a wood screw in the hole and 1 1/4" pan heads with washers in the recessed slots - this became perfect!
After drilling necessary pilot holes in the shelves and tops, (marked locations using a bare pencil lead through the holes in the support) was finally ready for finishing. But wait a minute!!
The plans had called for breadboard ends, and I chose not to do that trying to keep more with the Mission style. But the tops were sawn square with sharp edges - this just wouldn't do. Should I rout the edges? Maybe a thumbnail on the bottom? An internet search showed most of similar tables had somewhat rounded edges. I was about to use the tapering floor molding bit but then worried about tear out - so decided to sand the curves.
Setting up the conical disk with the table tilted 7 degrees to the right, gave me a 11 degree face. After sanding both sides, just needed a bit of hand block sanding to make the edges rounded. The tops got a wee bit smaller by doing this, but with a 2 1/4" overhang - no problem.
Now time for finishing!! Not so fast! The support blocks for the shelves had to be masked to prevent staining. These (the 4" in the middle) were to be both glued and screwed. Also had to tape the center edge of the shelf bottom. There's no worry about the top - no glue here!
Finally got to staining, used Watco Danish oil, Stained bottoms - let dry - assembled with glue and screws as appropriate - then finished staining. Finished that today!! Now to let it dry/cure for at least 72 hours. Now time to do some motorhome cleaning, etc.
Octogenarian's have an earned right to be a curmudgeon.
Chuck in Lancaster, CA
Whoops! Got carried away with the story of my shop week! Meant to dis-own carving with the SS, but the story got sooo long,-forgot.
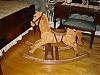
Carving with the SS? All you need is a small Dremel bit, and a steady hand. I'll try it one of these days. However to carve the bear, I used a knife and a couple of gouges. The small shelf was SS made.
If anyone wants to see the shelf - just click on the bear avatar.
Octogenarian's have an earned right to be a curmudgeon.
Chuck in Lancaster, CA
Got my three acres of lawn mowed, cleaned a rifle, and wet-sanded one of the pair of walnut and cherry nightstands, then put the fourth coat of tung oil on it. I'll have to rub it out, put on the fifth coat, let that dry, and then a couple of coats of wax and it's ready for the bedroom! Then I get to start on it's mate... that'll be another week to week and a half finishing process. Until they're both finished, no wood cutting for me. Gotta keep the dust down in the shop as much as possible.
Eric
Rock Creek Designs
Win if you can, lose if you must, but always cheat!
Please post some pictures when you get the table finished. I recently built a walnut and cherry coffee table and end tables for a customer and I'd like to see your design. On mine the legs were walnut and the rest of the tables were cherry (except for the glass top on the coffee table that is).
----------------------------------------
Leonard
La Vernia, TX
Wood Goods - Custom Woodwork
EMAIL: woodgoods "at" lavernia "dot" net
PowerPro 520, PowerPro 500 (was my father's 500), SS jointer, SS Mark V mount planer, SS bandsaws (2), belt sander, scroll saw, SS jig saws (2), strip sander, Jointech system, 12" Delta Compound Miter Saw, a small collection of routers, a router table and a Delta Unisaw. All in a 24' x 24' shop.